
How to Spot Overloaded Team Members Before Deadlines Slip
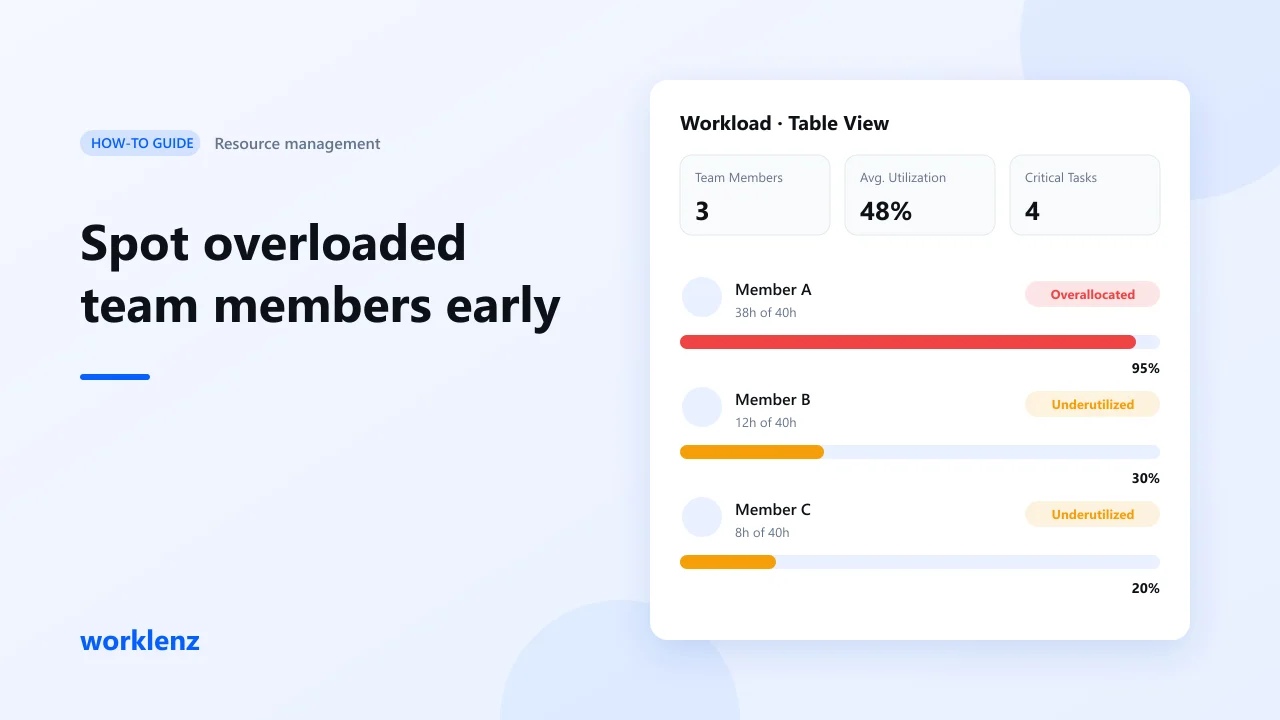
To spot an overloaded team member early, compare the hours of work each person holds with the hours they actually have, every week. In Worklenz that comparison lives on the project’s Workload tab: add an estimate to each task, and it shows capacity, allocated hours and utilization per person. The Workload tab is on the Pro plan.
Why overload is hard to see
Every team has someone who always says yes. They look fine until a deadline slips. The problem isn’t that people don’t speak up; it’s that a task list shows what needs doing, not whether the person has the time.
Three habits hide overload:
- Counting tasks, not hours. Four small tasks can be less work than one big one.
- Assuming equal capacity. Part-timers, leave and other projects get forgotten.
- Reacting late. Overload shows up as missed deadlines, after the damage is done.
What the Workload tab shows
Open a project and click Workload. You get three views: Chart View, Calendar View and Table View.
Summary cards at the top:
| Card | What it tells you |
|---|---|
| Team Members | How many people are on the project, and how many are overallocated, underutilized or optimal |
| Total Workload | Estimated hours across the team, plus hours actually logged |
| Average Utilization | How much of the team’s capacity is in use |
| Tasks | Total tasks and how many are critical |
The Table View lists each person with capacity, allocated hours, utilization, a status label and the number of tasks they hold.
How to read utilization
Utilization = allocated hours ÷ capacity.
| Reading | What it means | What to do |
|---|---|---|
| Very low | Room to take more, or waiting on work | Check they’re not blocked |
| Balanced | Work fits capacity with some slack | Leave it |
| Very high or over 100% | More work than hours | Move something this week |
Aim for balanced, not maxed out. A team at 100% every week has no room for sick days or the task that takes twice as long.
The weekly routine
Step 1: Add estimates to tasks
Utilization runs on hours. If tasks have no estimate, allocated hours stay at zero and everyone looks free. Add a rough estimate to each task; you can refine it later.
Step 2: Mark time off
Record leave and holidays so capacity reflects real availability. Time-off marking is available on every plan.
Step 3: Check the Workload tab every Monday
Use the date selector and filters to focus on this week and the people you care about. Look for anyone far above or below the rest.
Step 4: Compare people, not just numbers
If one person is far over and another has room, you can rebalance. Check the person with room has the right skills first.
Step 5: Rebalance early
Reassign a task, move a due date or split a large task between two people. A small change on Monday beats a rescue on Thursday.
Step 6: Spread critical tasks
The Tasks card shows how many tasks are critical. If one person holds most of them, one sick day stalls the project, even if their hours look fine.
Worked example
Three people, 40 hours each this week:
| Person | Before | After moving two ~10 h tasks |
|---|---|---|
| A | 38 h (95%) | 28 h (70%) |
| B | 12 h (30%) | 22 h (55%) |
| C | 8 h (20%) | 18 h (45%) |
The team average was fine before. The team wasn’t. After the move, nobody is overloaded or idle, and the deadline is safer.
Common mistakes
- No estimates. The tab looks calm when it isn’t.
- Checking once a month. Workload changes weekly.
- Planning everyone to 100%. Leave room for surprises.
Checklist
- Every task has an estimate
- Time off recorded
- Workload tab reviewed every week
- Anyone far above or below average discussed
- Critical tasks spread across more than one person
FAQ
Does Worklenz show workload across all projects?
Why does everyone show as underutilized?
Which plan includes the Workload tab?
Related: Resource management · Burnout in project management · How to run your hiring process as a project