
How to Plan a Project Timeline with Phases
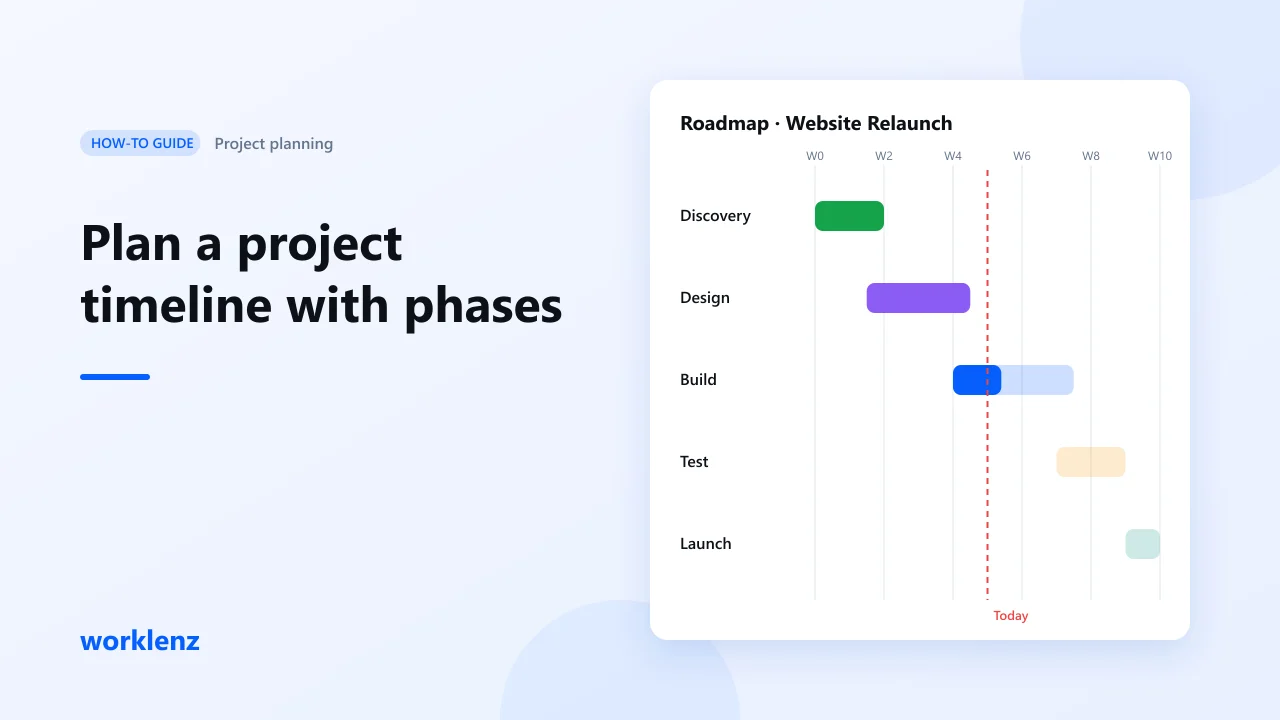
To plan a project timeline, break the work into a few phases, give each phase a start and end date, put every task in a phase, then watch the phases on a timeline. In Worklenz you set up phases on any plan, and the Roadmap tab shows them as a timeline. Viewing the timeline needs Pro; dragging dates on it needs Business.
Why phases beat one long task list
A 60-task list tells you nothing about whether you’ll launch on time. Five phases with dates do. Phases let you:
- see which part of the project is late, not just which task
- hand off between teams at clear points (design → build → launch)
- report progress to a client in one line per phase
What you’ll set up
| Step | Worklenz feature |
|---|---|
| 1. Choose your phases | Phases |
| 2. Date each phase | Phase start and end dates |
| 3. Put tasks in phases | Task phase field |
| 4. Order the work | Task dependencies |
| 5. See the timeline | Roadmap tab |
| 6. Track each phase | Phase details |
Step 1: Choose 4–6 phases
Example: a website relaunch.
| Phase | What happens | Ends with |
|---|---|---|
| Discovery | Goals, sitemap, content audit | Signed-off brief |
| Design | Wireframes, visual design | Approved designs |
| Build | Development, content entry | Staging site |
| Test | QA, fixes, client review | Launch go-ahead |
| Launch | Go live, redirects, monitoring | Live site |
Several built-in templates (for example, Software Development or Marketing) come with phases already. You can rename them to match your process.
Step 2: Give each phase dates
Set a start and end date for each phase. Leave a small buffer between phases that depend on someone outside your team, such as client approval of designs.
Step 3: Put every task in a phase
Add tasks and assign each one to a phase. Group by phase in the Task List to see what belongs where. A task without a phase won’t show up in phase progress.
Step 4: Add dependencies where order matters
Some tasks can’t start until others finish. Open the later task, go to Dependencies and add the earlier task as Blocked By. For a relaunch: “Set up redirects” is blocked by “Final URL list”.
Step 5: Open the Roadmap tab
The Roadmap tab shows your phases as bars on a timeline. You can see at a glance:
- which phases overlap
- where there’s a gap
- which phase is running past its end date
On Business, you can adjust dates directly on the timeline. On Pro, the timeline is read-only, so change dates on the phases themselves.
Step 6: Check phase details every week
Click a phase to open Phase Details. It shows:
- Overview: total tasks, completion and progress
- Timeline: start date, end date and status: Upcoming, In Progress, Overdue or Not Scheduled
- Task Breakdown: completed, pending and overdue tasks
- Tasks in this Phase: each task with its priority, assignees and dates
If a phase is “In Progress” but only 20% complete with a week left, you know which conversation to have.
Worked example
The relaunch has 48 tasks over 10 weeks. In week 5, the Roadmap shows Design ended a week late and Build has started. Phase Details for Build: 14 tasks, 3 done, 2 overdue. You move one developer from another project for two weeks and push the Test phase start by three days. The launch date holds.
Common mistakes
- Too many phases. More than six and they become task lists again.
- No dates on phases. The Roadmap shows them as Not Scheduled.
- Tasks without phases. Progress per phase looks better than it is.
- No buffer for client approvals. They’re the most common reason a phase slips.
Checklist
- 4–6 phases, each with a clear end result
- Start and end date on every phase
- Every task in a phase
- Dependencies added where order matters
- Phase Details reviewed weekly
FAQ
Is the Roadmap the same as a Gantt chart?
Can I share the timeline with my client?
Which plan do I need?
Plan your next launch by phase.
Create a free Worklenz accountRelated: Free Gantt chart maker · Website redesign template · Software development template